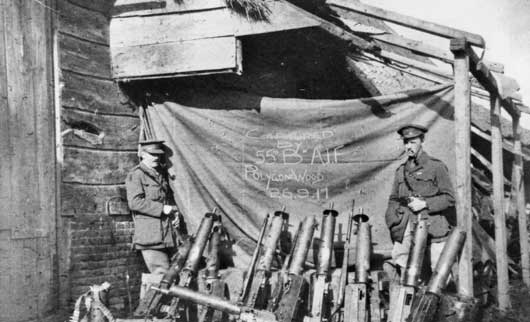
Polygon Wood 'Roar of a Gippsland Bushfire', 1917
The Battle in Brief
Polygon Wood was the second of three battles between 20 September and 4 October 1917 in which ‘step by step’ or ‘bite and hold’ tactics were used to batter down the formidable German defensive positions. After an opening bombardment the infantry would advance for a prescribed distance behind a ‘creeping’ barrage of shells. This barrage would keep the Germans in their ‘pillboxes’ until British soldiers were almost upon them. The enemy positions would then be captured consolidated and protected from counter-attack by artillery. Artillery would be brought forward and the next ‘bite’ attempted. In this way the British aimed to work their way from their start lines near Ypres to the heights of the ridge ten kilometres away at Passchendaele village.
At Menin Road on 20 September 1917, in the first use of the ‘bite and hold’, the Australians sustained 5,000 killed and wounded but the tactics had been proven and, combined with the allied superiority in artillery, showed that, with fine weather, the allies were now in a superior position. Both the British and the Germans suffered similar casualties, but while the British were elated at the results, the Germans were crushed by the defeat.
The next battle was Polygon Wood and Charles Bean, the Australian Official Historian described the opening barrage on 26 September as the most perfect that ever protected Australian troops and that it rolled ahead of the troops roaring ‘like a Gippsland bushfire’.
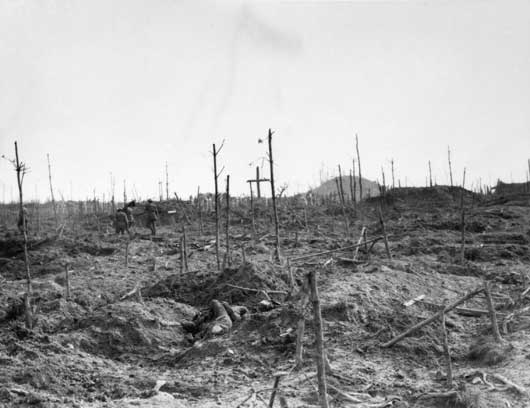
The name Polygon Wood derived from a plantation forest that lay along the axis of the Australian advance. Shelling had reduced the wood to little more than stumps and broken timber. Seven divisions, five British and two Australian, advanced behind the screen of shells – the ‘creeping barrage’ as it was known – and seized most of their objectives. The Germans launched several counter-attacks but these were thwarted by the heavy defensive artillery barrages used to protect the infantry consolidating their objectives. However, despite the success, 5,770 Australian were killed or wounded.
The next ‘bite and hold’ operation was the Battle of Broodseinde on 4 October 1917. Twelve divisions, including three Australian and the New Zealand Division, attacked on a 13-kilometre front with four Anzac divisions in the centre fighting side-by-side for the first time. Following the usual stiff fighting around ‘pillboxes’, the Australians gained all their objectives on the ridge, though at the cost of 6,500 casualties; the New Zealanders suffered a further 1,700 casualties. Along the whole line the attack had been successful, thereby giving the British forces their first glimpse of the lowlands beyond the top of the ridge since May 1915. Of Broodseinde, Charles Bean, Australia’s official historian, wrote: “The day’s success was a very great one – indeed the most complete yet won by the British Army in France in that war.”
Location
Media